Create and manage schedules
Schedules on Camelo allow you to group employees or team members and manage shifts separately. If your workplace has different physical locations, teams, departments, or groups of members, you can create separate schedules for each of them.
Notes
- Users with Owner or Schedule Manager role can create and manage schedules.
- Deleting a schedule cannot be undone, and doing so will delete all shifts, templates, and job sites related to that schedule.
Create a schedule
Computer
iOS
Android
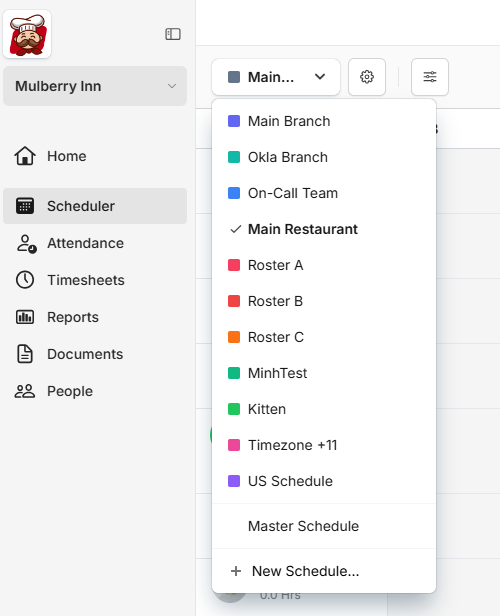
- On the Camelo web app, in the left navigation bar, click Scheduler.
- Click the button in the top-left corner.
- Click + New Schedule.
- Enter the name for the new schedule, then click Save.
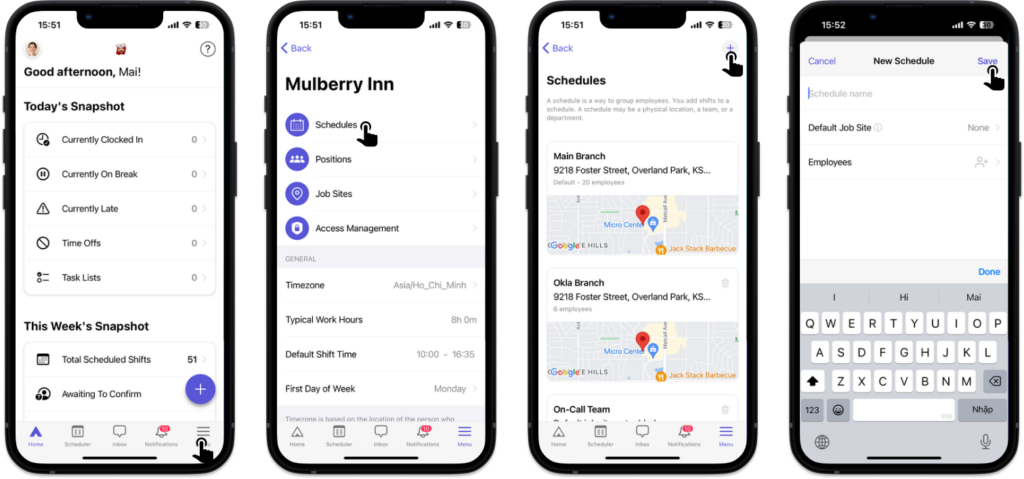
- Go to the Menu tab at the bottom of your screen.
- Select My Company.
- Select Schedules.
- Tap the button in the top-right corner.
- Enter the name of the schedule.
- Select the default job site of the schedule.
- Select the employees of that schedule, then tap Done.
- Tap Save.
- Go to the Menu tab at the bottom of your screen.
- Select My Company.
- Select Schedules.
- Tap the button in the top-right corner.
- Enter the name of the schedule.
- Select the default job site of the schedule.
- Select the employees of that schedule, then tap Done.
- Tap Save.
Assign users to a schedule
Computer
iOS
Android
- On the Camelo web app, in the left navigation bar, click People.
- Select a user and click Edit to edit their profile.
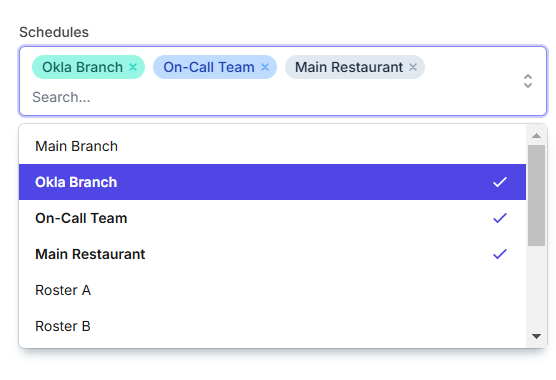
- Use the Schedules dropdown to assign the user to schedules.
- When you’re done, click Update.
- Go to the Menu tab at the bottom of your screen.
- Select My Company.
- Select Schedules.
- Select a schedule you want to assign users to.
- Enter the name of the schedule.
- Tap Employees and select users you want to assign to the schedule.
- When you’re done, tap Done.
- Tap Save.
- Go to the Menu tab at the bottom of your screen.
- Select My Company.
- Select Schedules.
- Select a schedule you want to assign users to.
- Enter the name of the schedule.
- Tap Employees and select users you want to assign to the schedule.
- When you’re done, tap Done.
- Tap Save.
Edit a schedule information
Computer
iOS
Android
- On the Camelo web app, in the left navigation bar, click Scheduler.
- Click the button in the top-left corner.
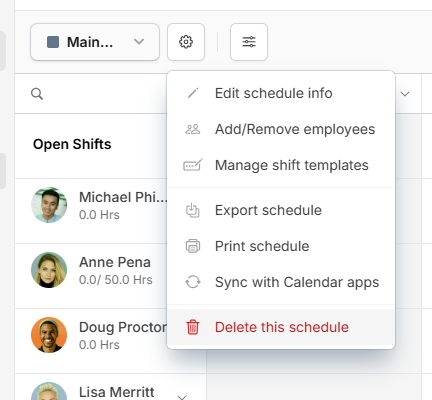
- Select the schedule you want to edit info.
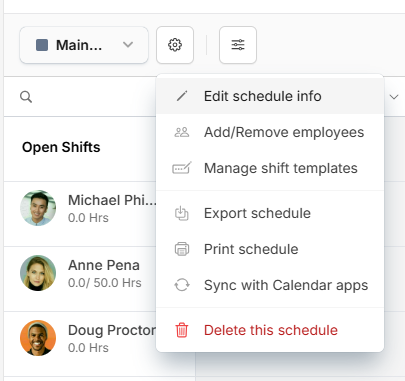
- Click the button next to the dropdown and select Edit schedule info.
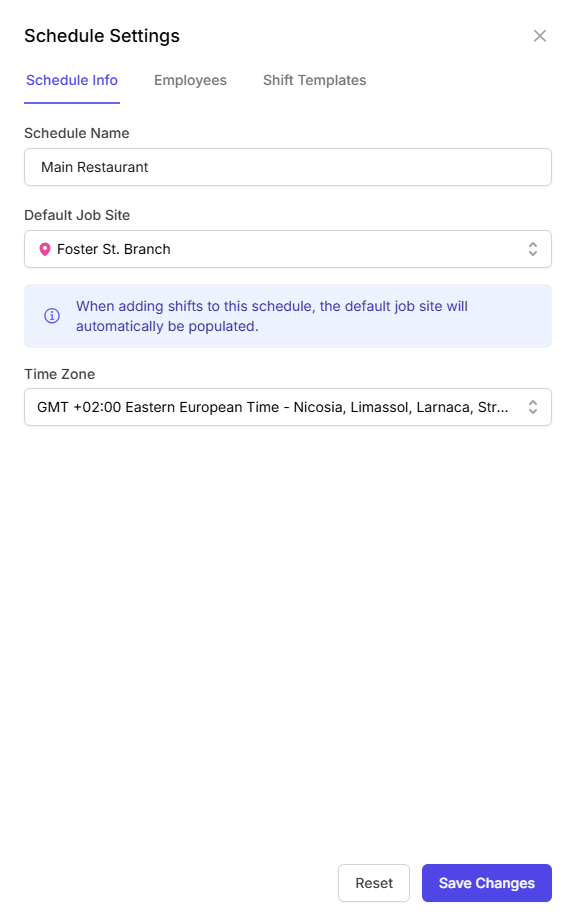
- From here you can edit schedule name, default job site, time zone, employees, or shift templates.
- When you’re done editing, click Save Changes.
- Go to the Menu tab at the bottom of your screen.
- Select My Company.
- Select Schedules.
- Tap the schedule you want to edit and make changes.
- When you’re done, tap Save.
- Go to the Menu tab at the bottom of your screen.
- Select My Company.
- Select Schedules.
- Tap the schedule you want to edit and make changes.
- When you’re done, tap Save.
Delete a schedule
⚠ Deleting a schedule means all shifts, templates, and job sites related to this schedule will be deleted. Deleting a schedule cannot be undone.
Computer
iOS
Android
- While in the Scheduler, click the dropdown menu in the top left corner to select a schedule.
- Click the button next to the dropdown.
- Click Delete this schedule.
- A dialog box will appear to confirm your deletion. Enter the schedule name and click I understand, delete anyway to delete the schedule.
- Go to the Menu tab at the bottom of your screen.
- Select My Company.
- Select Schedules.
- Tap the button next to the schedule you want to delete.
- Tap Delete to confirm your deletion.
- Go to the Menu tab at the bottom of your screen.
- Select My Company.
- Select Schedules.
- Tap the button next to the schedule you want to delete.
- Tap Delete to confirm your deletion.
