Create and manage job sites
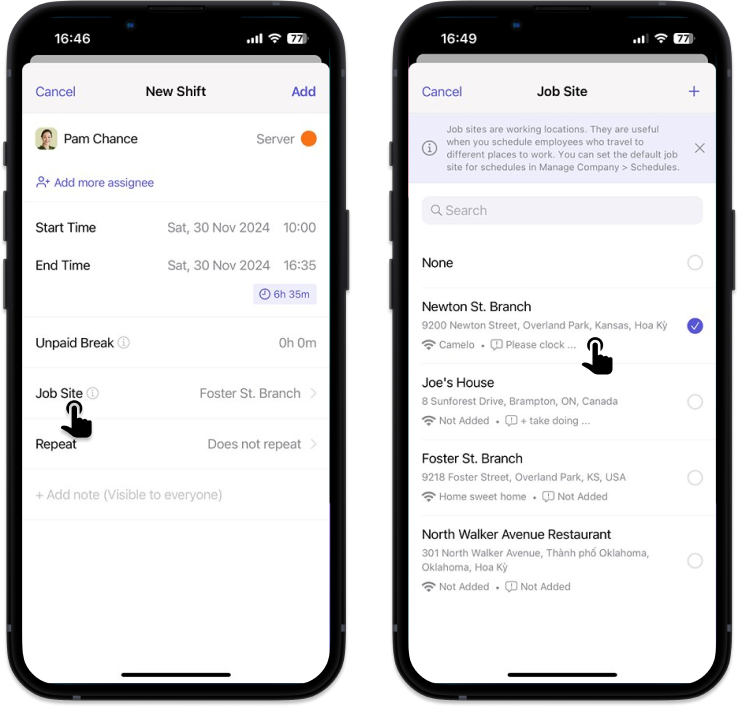
A job site is a location where a shift takes place. When you create a shift on Camelo, you can add a job site to the shift so your employee knows where they work.
Note: Assigning a job site to a shift is optional. If you don’t choose any job site when creating a shift, the shift will not display a specific working location.
When to use job sites
You can use job sites for shifts that take place outside of your usual workplace or at a specific location inside your workplace.
Who can create and edit job sites
You must have the Owner or Schedule Manager role to create and edit job sites.
Create a job site
- Click the in the top-right corner to go to settings.

- Click Job Sites.
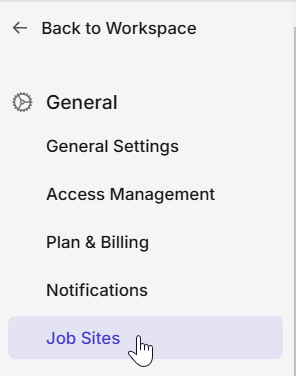
- Click + Add New Job Site.

- Enter details of the job site.
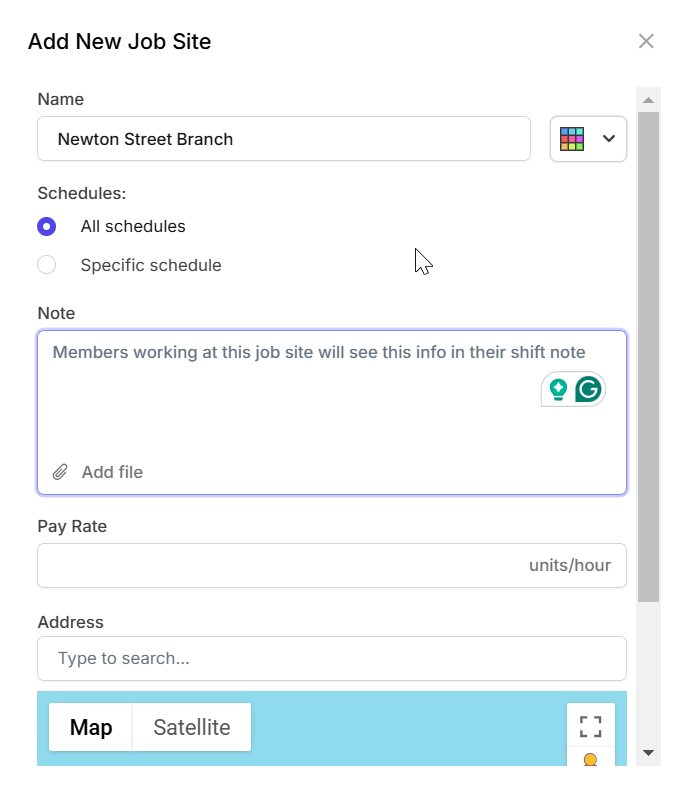
- Click Save to finish.
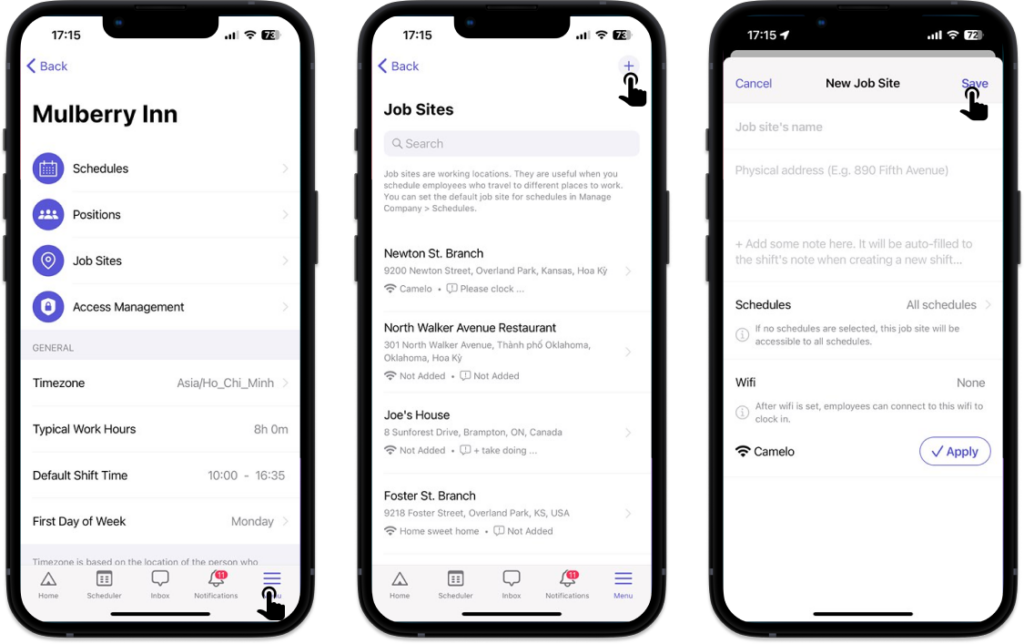
- Go to the Menu tab at the bottom of your screen, then select My Company.
- Select Job Sites.
- Tap the + button in the top-right corner.
- Enter the name and the physical address of the job site. You can also set up the Wifi network of the job site here.
- Add job site notes.*
- Tap Save to finish.
- Go to the Menu tab at the bottom of your screen, then select My Company.
- Select Job Sites.
- Tap the + button in the top-right corner.
- Enter the name and the physical address of the job site. You can also set up the Wifi network of the job site here.
- Add notes for the job site.*
- Tap Save to finish.
Job Site Notes
*Job Site Notes will be automatically added to the Shift Notes section when you create a new shift taking place at that job site. (You can always edit Shift Notes to something else later.)
Job site notes can be useful if you want to give specific reminders to employees working at a specific job site.
For example, if all employees working at Oklahoma job site need to clock in using the iPad at the main entrance, you can add this information to the Job Site Notes. Every time you assign a shift at Oklahoma to someone, the information will be automatically added to the Shift Notes section in their shift details so they know where to clock in.

Edit a job site
- Click the to go to settings.
- Click Job Sites.
- Click the next to the job site you want to edit.
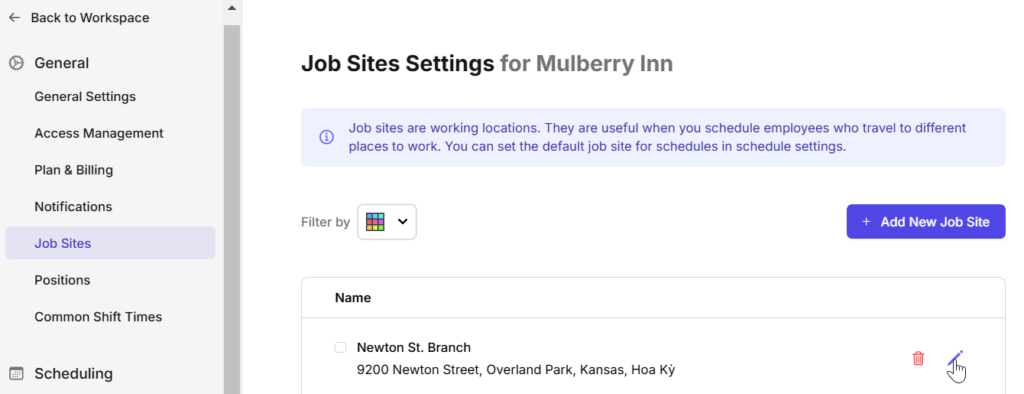
- Make changes, then click Save to finish.
- Go to the Menu tab at the bottom of your screen, then select My Company.
- Select Job Sites.
- Select the job site you want to edit.
- Make changes, then tap Save.
- Go to the Menu tab at the bottom of your screen, then select My Company.
- Select Job Sites.
- Select the job site you want to edit.
- Make changes, then tap Save.
Add attachments to a job site
You can attach files to a job site when creating a new job site or updating an existing one. When a shift is scheduled at that job site, the assignee will be able to see these attached files.
The upload limit is 5 files, 10MB max per file.
- Click the to go to settings.
- Click Job Sites.
- If you want to add attachments to an existing job site, click the next to that job site. If you want to create a new job site with attachments, click + Add New Job Site.
- Click Add attachment to upload files.
- When you’re done, click Save.
Currently, you can only view attachments on the mobile app. Please use the web app to upload attachments.
Currently, you can only view attachments on the mobile app. Please use the web app to upload attachments.
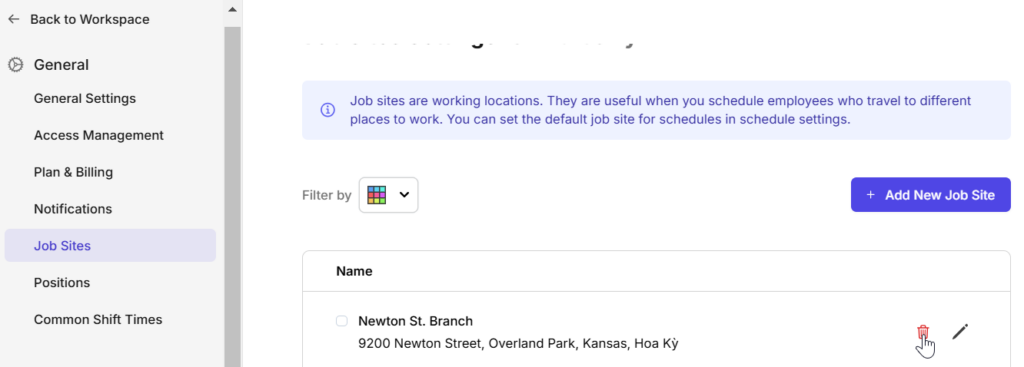
Delete a job site
- Click the in the top-right corner to go to settings.
- Click Job Sites.
- Click the next to the job site you want to delete.
- A confirmation box will appear. Click Yes to delete the job site.
- Go to the Menu tab at the bottom of your screen, then select My Company.
- Select Job Sites.
- Swipe the job site you want to delete to the left to delete it.
- A dialogue box will appear to confirm that you want to delete the job site. Tap Delete.
- Go to the Menu tab at the bottom of your screen, then select My Company.
- Select Job Sites.
- Swipe the job site you want to delete to the left to delete it.
- A dialogue box will appear to confirm that you want to delete the job site. Tap Delete.
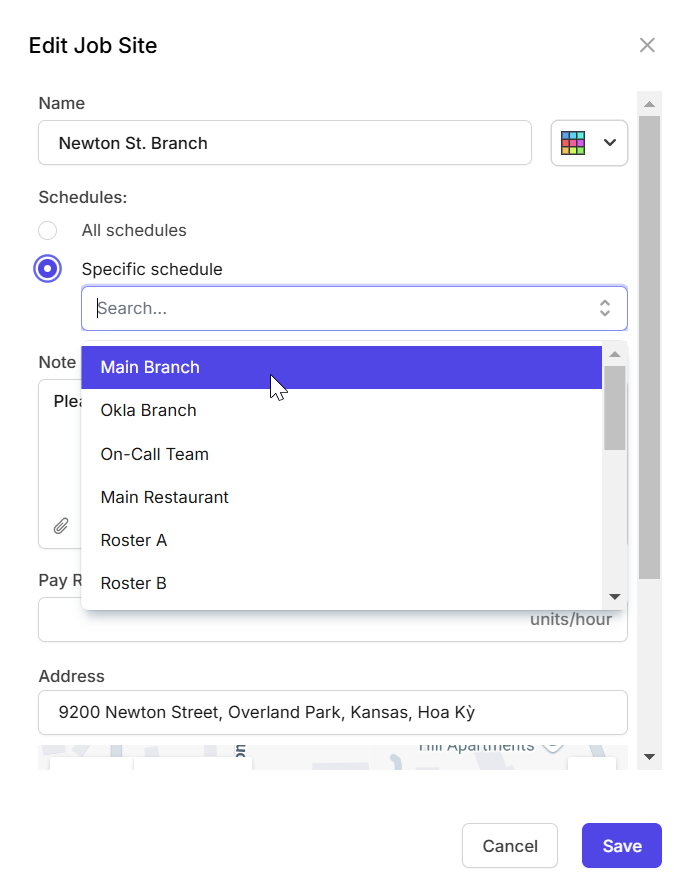
Add a default job site to a schedule
When you create a shift, the job site is pre-selected based on the default job site of your schedule.
- Click the to go to settings.
- Click Job Sites.
- Click the next to the job site you want to edit.
- Add the default job site for the schedule, then click Save to finish.
- Go to the Menu tab at the bottom of your screen, then select My Company.
- Select Schedules.
- Select the schedule you want to add a default job site.
- Tap Default Job Site. From here, you can tap the + button to add a new job site or select an existing job site.
- Tap Save to finish.
- Go to the Menu tab at the bottom of your screen, then select My Company.
- Select Schedules.
- Select the schedule you want to add a default job site.
- Tap Default Job Site. From here, you can tap the + button to add a new job site or select an existing job site.
- Tap Save to finish.
