View and add positions
A position on Camelo can be a role, task, job title, or duty of an employee/team member. For example, store manager, cashier, janitor, receptionist, cleaning, etc. are all positions.
On Camelo, you can:
- View all of the positions in your business and the employees working in each position;
- Assign employees to positions;
- Assign positions to your employees.
View all positions in your business
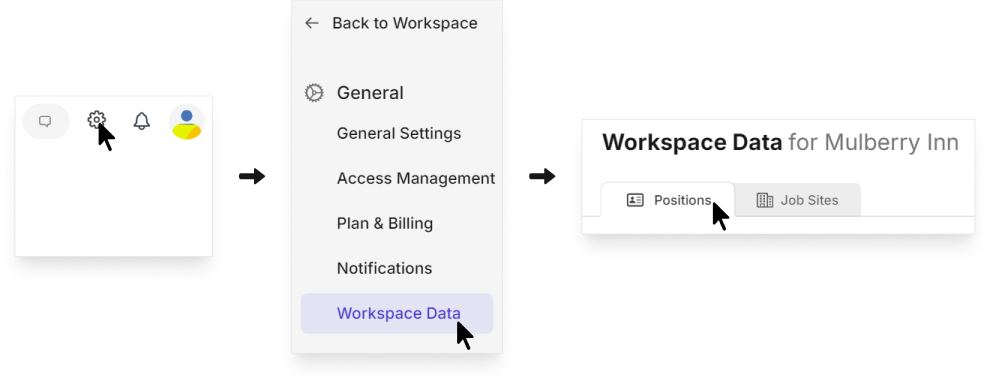
- Click the button in the top-right corner.
- Click Workspace Data.
- In the Positions tab, you can view a list of all positions in your business.
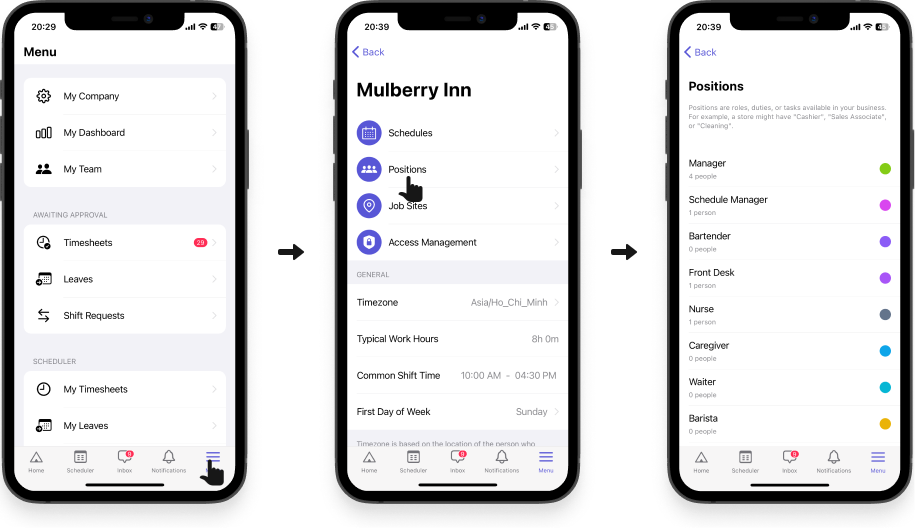
- Go to the Menu tab.
- Select My Company, then select Positions and you can view a list of all positions in your business. You can also tap any position to view all employees working in that position.
- Go to the Menu tab.
- Select My Company, then select Positions and you can view a list of all positions in your business. You can also tap any position to view all employees working in that position.
There are 2 ways you can assign positions to your employees on the Camelo app:
1. Assign employee(s) to a position
Tip: You can add or remove multiple employees from a position using this method.
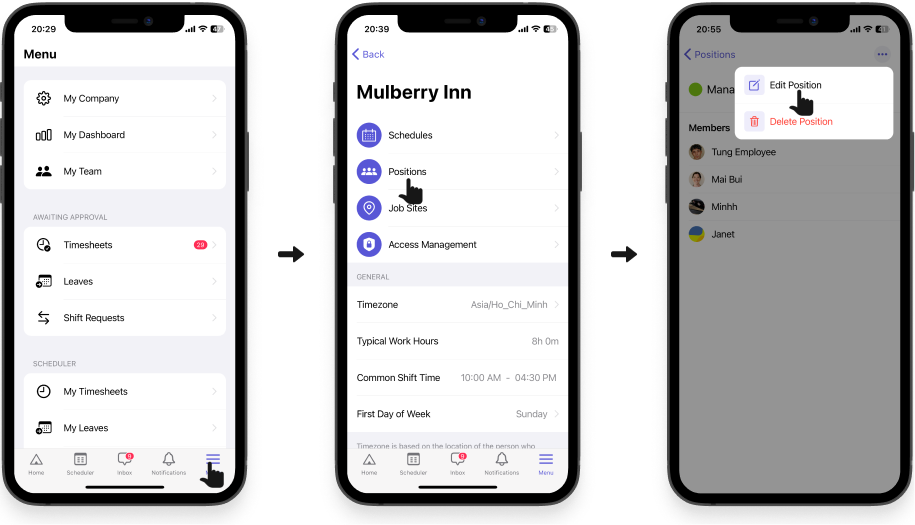
- Go to the Menu tab and select My Company.
- Select Positions, then select the position you want to assign employee(s) to.
- Tap ••• in the top-right corner and select Edit Position.
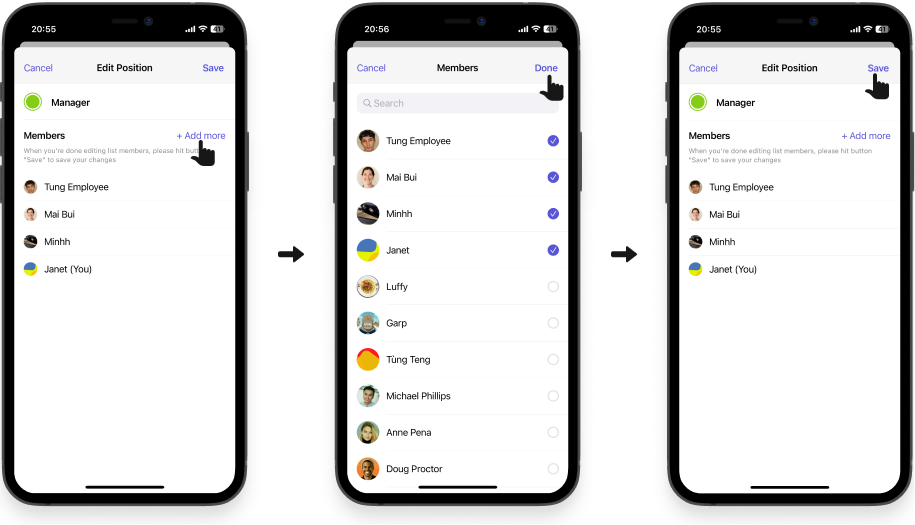
- Tap Add more.
- Select the employees you want to add to that position. You can also remove employees from that position within this screen. Selected employees will have a checkmark next to their names.
- When you’re finished, hit Done.
- Don’t forget to tap Save to save your changes.
Tip: You can add or remove multiple employees from a position using this method.
- Go to the Menu tab and select My Company.
- Select Positions, then select the position you want to assign employee(s) to.
- Tap ••• in the top-right corner and select Edit Position.
- Tap Add more.
- Select the employees you want to add to that position. You can also remove employees from that position within this screen. Selected employees will have a checkmark next to their names.
- When you’re finished, hit Done.
- Don’t forget to tap Save to save your changes.
2. Assign position(s) to an employee
- Visit https://dashboard.camelohq.com/. In the left navigation bar, click People.
- Click the employee you want to assign a position.
- Click Edit.
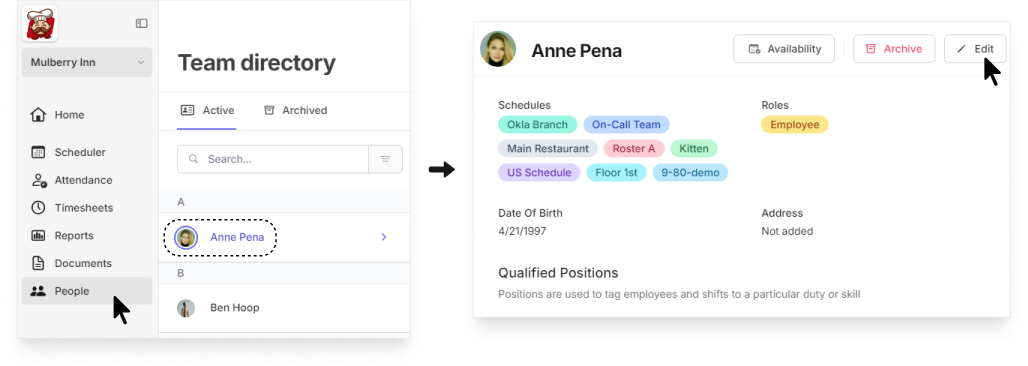
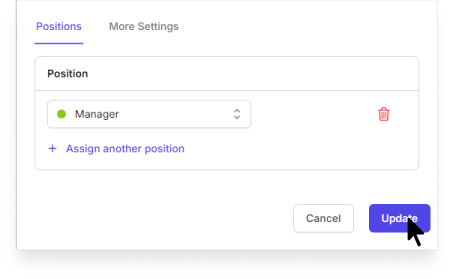
- Under the Position section, you can select positions or add a new one for your employee.
- When you’re done, click Update.
Tip: You can add or remove multiple positions of each employee using this method.
- Go to the Menu tab and select My Team.
- Select the employee you want to assign a position to.
- Tap ••• in the top-right corner and select Edit.
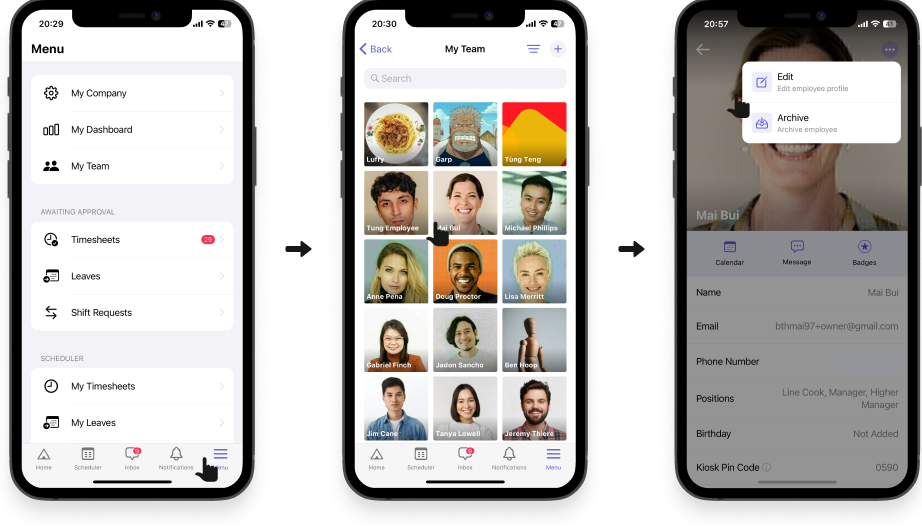
- Select Positions and a list of positions will be shown. From here you can select positions or add a new one for your employee. Selected positions will have a checkmark next to them.
- After you’ve assigned a position to the employee, tap Done.
- Don’t forget to tap Save to save your changes.

Tip: You can add or remove multiple positions of each employee using this method.
- Go to the Menu tab and select My Team.
- Select the employee you want to assign a position to.
- Tap ••• in the top-right corner and select Edit.
- Select Positions and a list of positions will be shown. From here you can select positions or add a new one for your employee. Selected positions will have a checkmark next to them.
- After you’ve assigned a position to the employee, tap Done.
- Don’t forget to tap Save to save your changes.
NOTE: You can only assign positions to an employee officially using the 2 methods above. The positions will be displayed on the employee’s profile. If you assign a new position to an employee when you create a new shift or timesheet for that employee, that position will only be assigned to that employee for that shift or timesheet only. It won’t be displayed on the employee’s profile.
