Quick start guide for business owners, managers, and admins (web)
Are you new to Camelo and not sure where to start? Follow these 5 steps to start scheduling and managing your team on Camelo.
1. Set up your business
To schedule faster on Camelo, take the time to set up these 3 main parts on Camelo:
- Schedules
- Job Sites
- Positions
Schedule: A Schedule is a way to group your employees. Each Schedule includes shifts, job sites, positions, etc. of the team members within that Schedule. You can create different Schedules for different branches, teams, stores, or departments of your workplace.
Job Site: A Job Site is a working location. It can be useful to schedule employees who travel to different places to work. A Schedule can include one or multiple Job Sites.
Position: A Position is a role, duty, or task in your workplace. For example, “manager”, “server”, or “cleaning”.

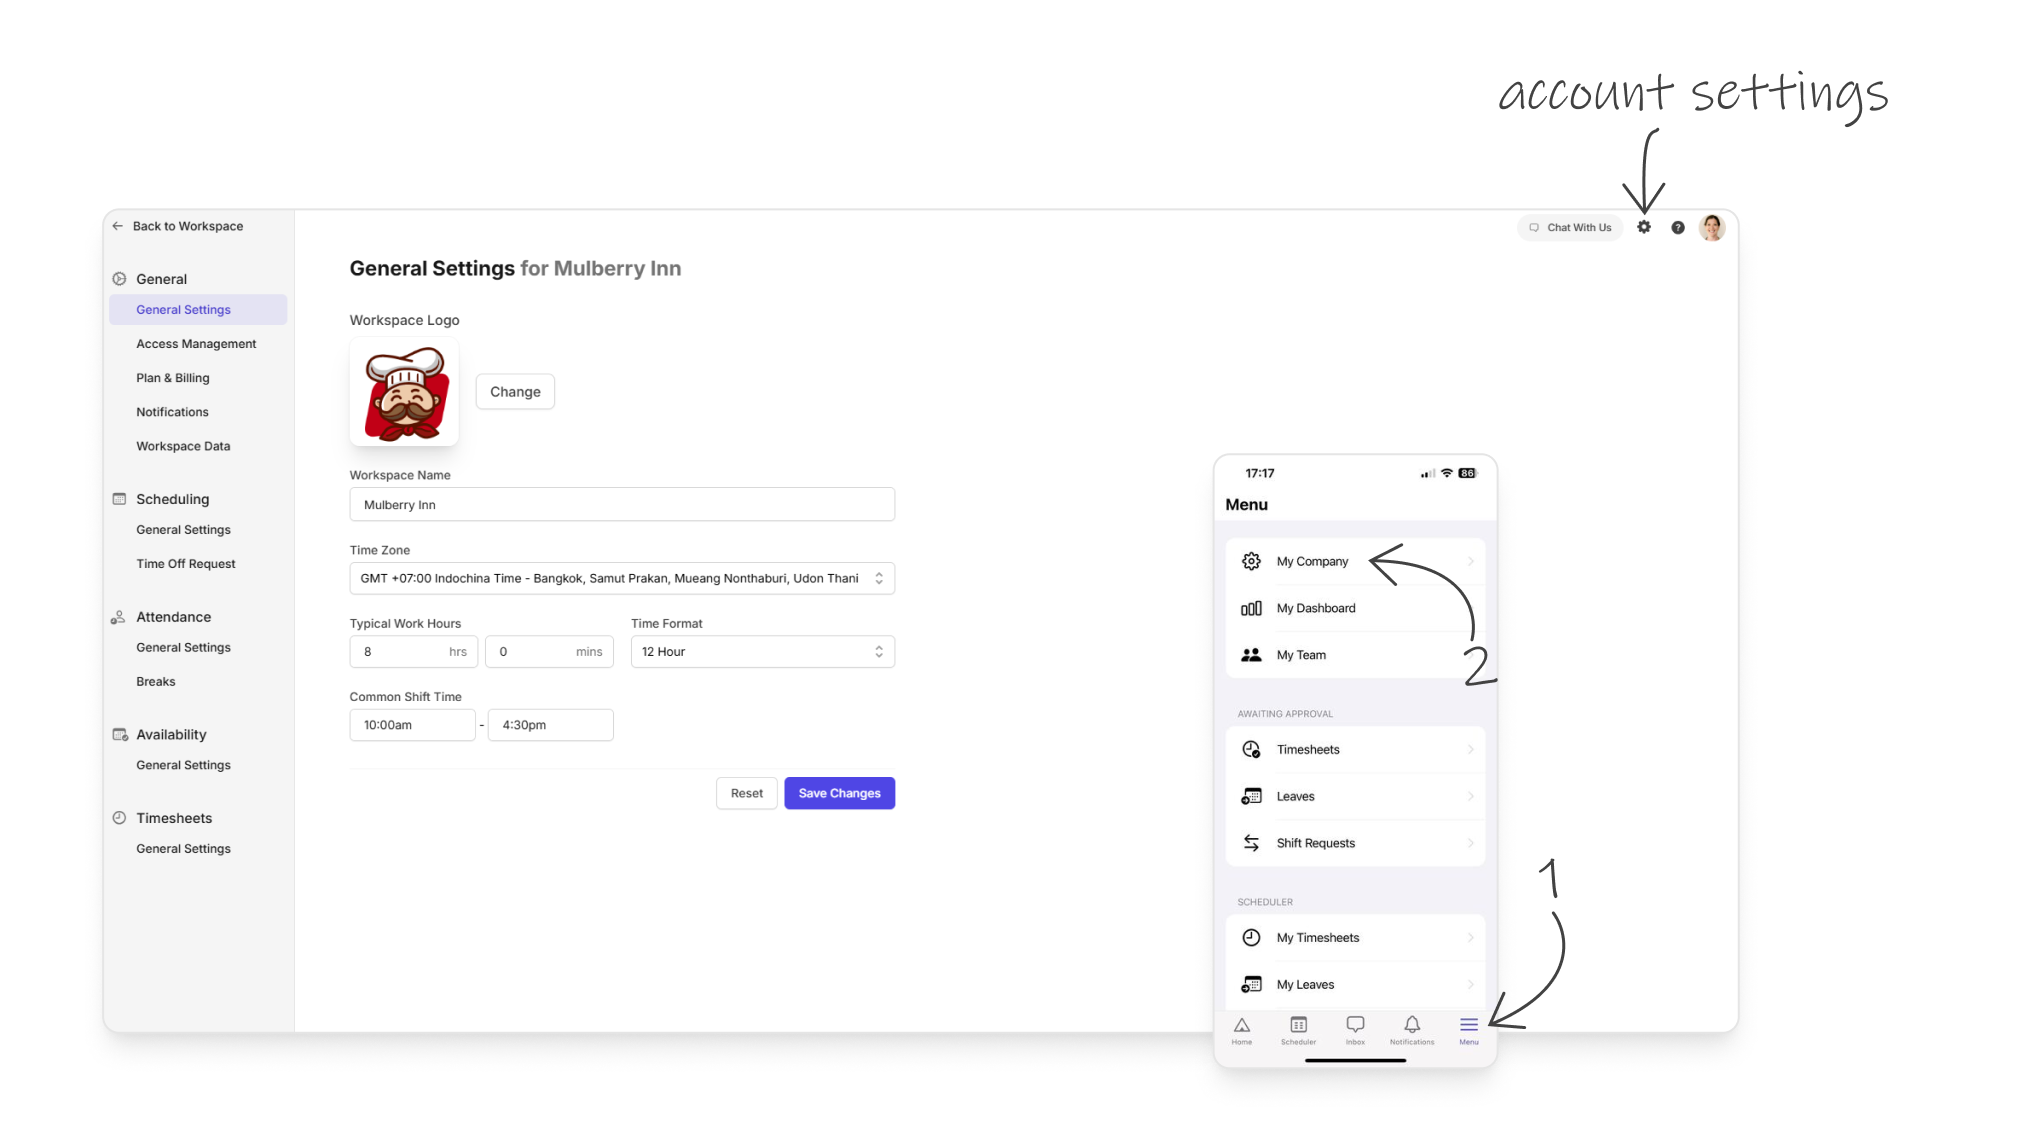
2. Set up your account settings
You can go to settings to adjust account settings so they suit your business operations. Here are some important settings that you can set up:
- Typical work hours, time format, and common shift time.
- How you want your team to clock in and out.
- How unpaid breaks are managed.
- How you want to round timesheets.
To change your account settings, you can:
- On web, click the button
- On mobile, go to Menu → My Company.
3. Add your team
Now that you’ve set up your account, it’s time to bring your team in. There are 3 main ways you can add your team:
- Add manually: Enter the emails of the employees you want to add. You can add multiple employees in a row.
- Share join code: Send a join code to your team members so they can join your business account by themselves.
- Import from spreadsheet: Upload an Excel file to bulk import your team. You can use the template here.
To add and manage people in your team, you can:
- On web, go to the Contacts tab.
- On mobile, go to Menu → My Team.

4. Schedule your team
Once you’ve set up all the information necessary for scheduling and added your team, you can start scheduling.
Go to the Scheduler on either the web app or the mobile app, fill in shift details and then hit Publish to notify your team of their shifts.
📌 If you need help setting up your account and start scheduling, contact us and we’ll walk you through all the necessary steps.
