Add a shift
After adding employees to your business account, you can start building schedules for employees.
Before sending a schedule to everyone, you need to add shifts to that schedule first.
Add a shift
Computer
Mobile
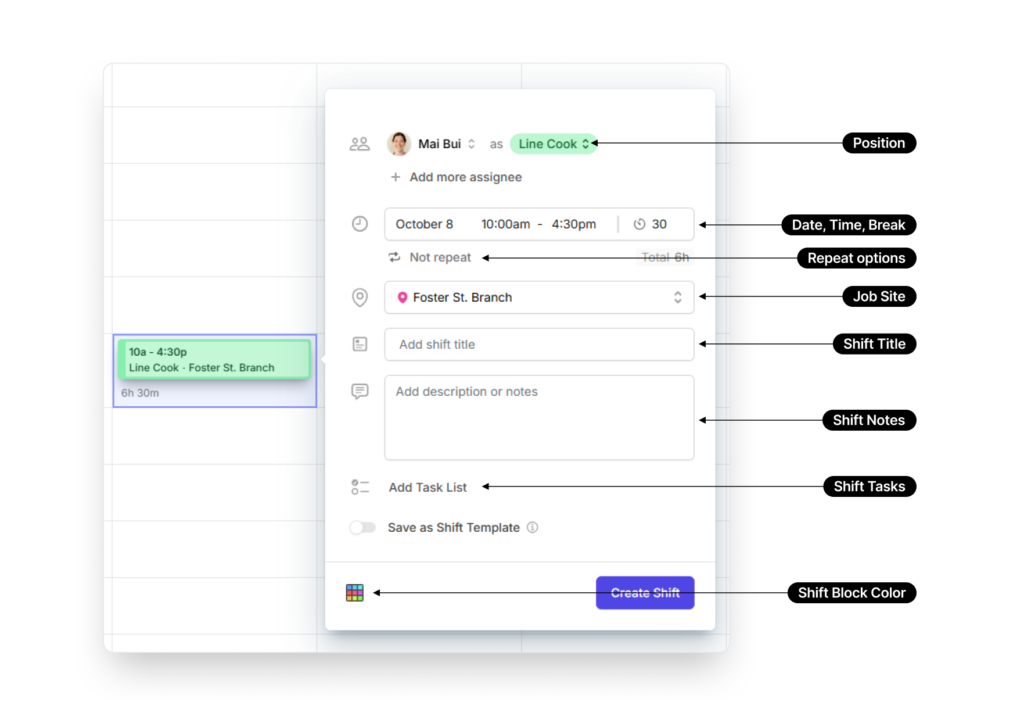
- Hover over the cell you want to add a shift, click the button at the bottom-right corner.
- Click Create Custom Shift. If you have pre-made shift templates, you can select one here instead of entering details manually.
- Fill in the details of the shift:
- Assign To: Select the employee you want to assign the shift to.
- Open Shift: Turn this off if you want to assign the shift to a specific employee.
- Start Time: Select the starting date and time of the shift.
- End Time: Select the ending date and time of the shift.
- Unpaid Break: Enter the duration of the unpaid break of the shift.
- Position: Select the duty/job title of the employee taking that shift.
- Note: Write down your notes for the assignee.
- Attachments: Upload files to attach them to the shift.
- Job Site: Select the location where the shift takes place.
- Repeat: Select options to create recurring shifts.
- When you’re done, click Create Shift.

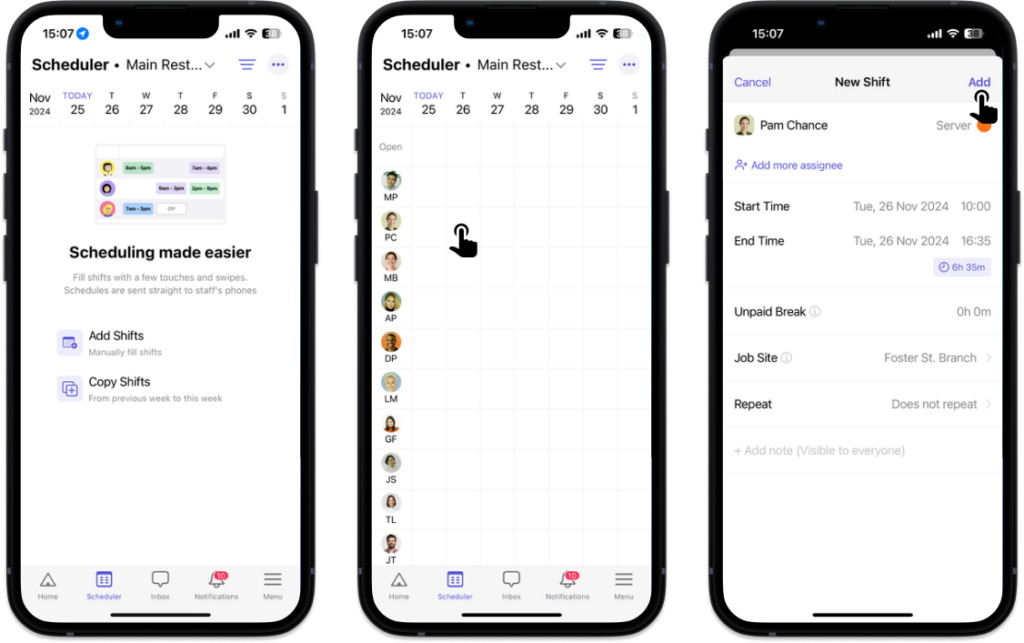
- Go to the Scheduler tab at the bottom of your screen.
- Select Add Shift or tap a calendar cell to add a shift.
- Fill in the details of the shift:
- Open Shift: Turn this off if you want to assign the shift to a specific employee.
- Employee: Select the employee you want to assign the shift to.
- Start Time: Select the starting date and time of the shift.
- End Time: Select the ending date and time of the shift.
- Unpaid Break: Enter the duration of the unpaid break of the shift.
- Position: Select the duty/job title of the employee taking that shift.
- Job Site: Select the location where the shift takes place.
- Repeat: Select options to create recurring shifts.
- Add note: Write down your note.
- Tap Add.

💡 From the Scheduler tab, you can click/tap any block on the calendar to create a shift. This will be convenient as you can assign shifts to a specific employee, for a specific date.


