Assign roles to members
Different roles in Camelo have different levels of access and permission to data.
Roles in Camelo
There are 5 roles in Camelo: Owner, Schedule Manager, Payroll Admin, Employee and Contractor.
- Owner can manage the entire business account and all data within the business account.
- Schedule Manager can view timesheets, manage shifts and leave requests of their schedules.
- Payroll Admin can manage timesheets.
- Member can view their shifts, team schedules, leave requests, and timesheets. This is the default role of people added to the workspace.
- Restricted Member cannot view other members’ information. They can only access their own schedules, leave requests, timesheets, and other personal data.
Assign roles to members
You can assign roles to members of your business account so they can access and manage certain data.
Computer
iOS
Android
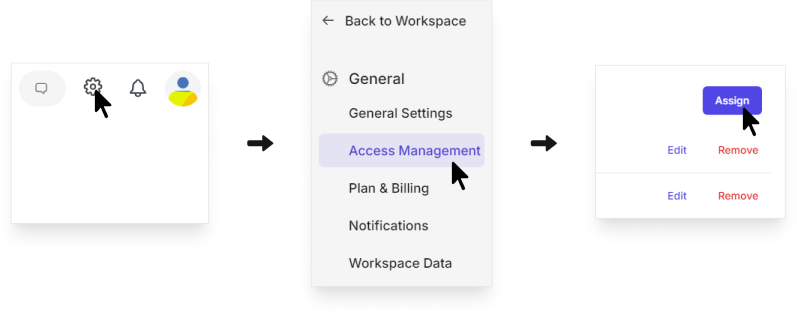
- On the Camelo web app, click the button in the top-right corner.
- In the left navigation bar, click Access Management.
- Click Assign button on the role you want to add/remove employees.
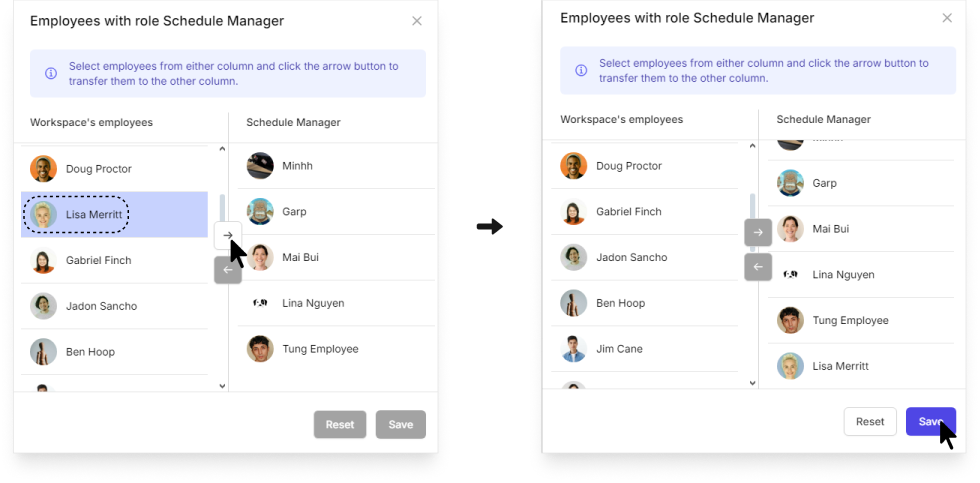
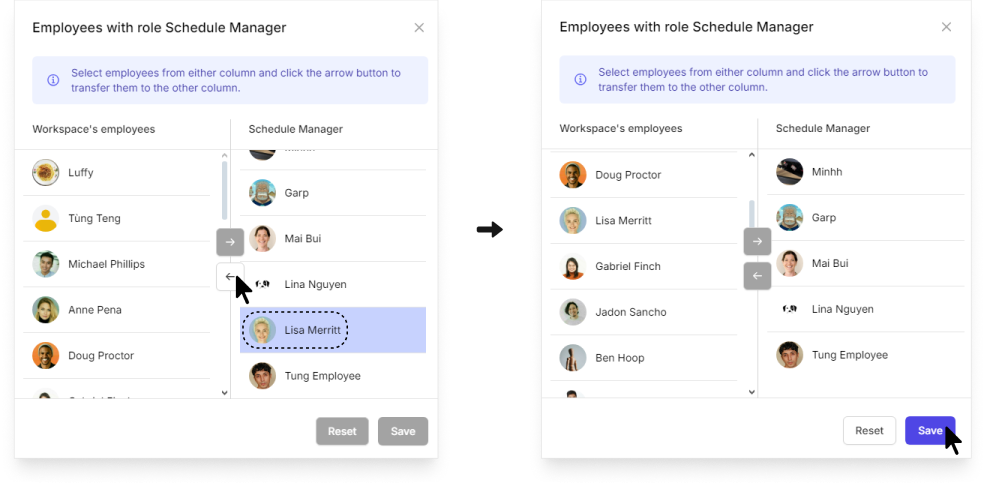
- Select employees from Workspace’s Employees column and click the → button to transfer them to the role column.
- When you’re done, click Save.
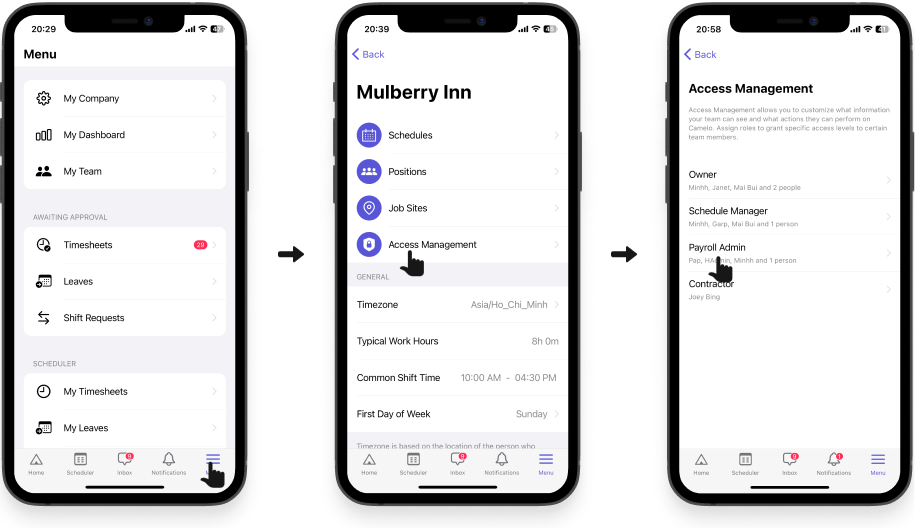
- Go to the Menu tab at the bottom of your screen, and select My Company.
- Select Access Management.
- Select a role.
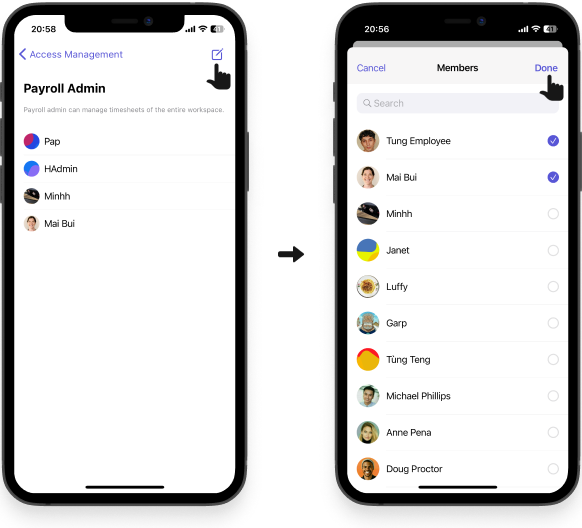
- Tap in the top-right corner of your screen.
- Select the member(s) you want to assign the role.
- Tap Done to finish.
- Go to the Menu tab at the bottom of your screen, and select My Company.
- Select Access Management.
- Select a role.
- Tap in the top-right corner of your screen.
- Select the member(s) you want to assign the role.
- Tap Done to finish.
Now the members you’ve added will be able to perform actions permitted for their role.
Remove roles of members
You can remove the roles of members in your business account if you don’t want them to access and modify certain data.
Computer
iOS
Android
There are 2 ways to remove roles of members:
From Access Management Settings:
- On the Camelo web app, click the button in the top-right corner.
- In the left navigation bar, click Access Management.
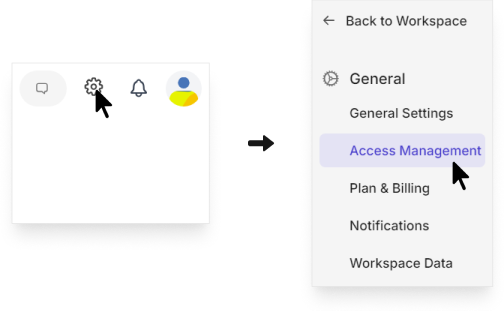
- Click Remove button on the members you want to remove from their roles.

From Workspace’s Employees Settings:
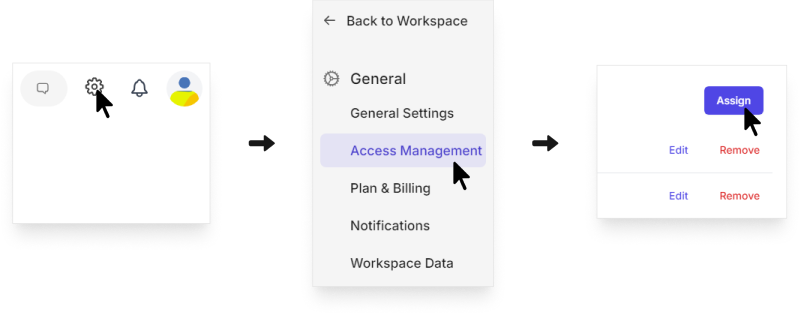
- On the Camelo web app, click the button in the top-right corner.
- In the left navigation bar, click Access Management.
- Click Assign button on the role you want to add/remove employees.
- Select employees from the role column and click the ← button to transfer them back to the Workspace’s Employees column.
- When you’re done, click Save.
- Go to the Menu tab at the bottom of your screen, and select My Company.
- Select Access Management.
- Select a role.
- Tap in the top-right corner of your screen.
- Deselect the member(s) you want to remove the role.
- Tap Done to finish.
- Go to the Menu tab at the bottom of your screen, and select My Company.
- Select Access Management.
- Select a role.
- Tap in the top-right corner of your screen.
- Deselect the member(s) you want to remove the role.
- Tap Done to finish.


